Introduction

Digital art has revolutionized how artists create and share their work, and for anime enthusiasts, finding the right tools is crucial for capturing the unique style and intricate details of anime. One tool that has been gaining popularity among digital artists is Kleki. This online paint tool is known for its simplicity and versatility, making it an excellent choice for both beginners and seasoned artists. In this comprehensive guide, we’ll explore the various features of Kleki, provide tips on how to create stunning anime art, and share advanced techniques to help you make the most of this powerful tool.
What is Kleki?
Overview of Kleki

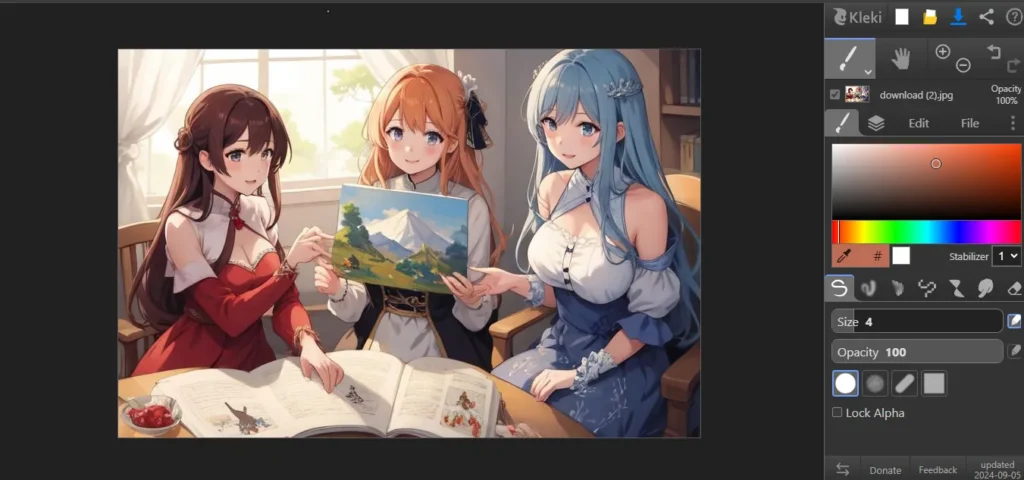
Kleki is a free, web-based paint tool designed to be user-friendly while offering a range of features that cater to digital artists. Its intuitive interface and accessible features make it an ideal platform for creating digital art, including detailed anime illustrations. With Kleki, artists can sketch, ink, color, and add effects all within the same platform, making it a one-stop solution for many artistic needs.
Features of Kleki Paint Tool
Layer Management: Kleki’s layer management system is one of its standout features. Artists can create multiple layers, which is essential for separating different components of a drawing. This feature allows for non-destructive editing, making it easier to adjust individual elements without affecting the entire artwork.
Brush Customization: The brush tool in Kleki offers a variety of settings that can be adjusted to suit different artistic styles. You can modify brush size, opacity, and texture, providing the flexibility needed for detailed line work, smooth shading, or dynamic textures.
Cherry Magic Anime Explained: Release Date, Where to Watch, and Why It’s a Must-See -2024
Color Palette: An effective color palette is crucial for anime art. Kleki provides a user-friendly color picker and palette options, allowing you to create and save custom color schemes. This feature is particularly useful for maintaining consistency in your artwork and achieving the vibrant colors characteristic of anime.
Simple Interface: Kleki’s clean and straightforward interface ensures that artists can focus on their creative process without being overwhelmed by complex menus and tools. The essential features are easily accessible, making it a great choice for those who prefer a minimalist approach.
Undo and Redo: Mistakes are part of the creative process, and Kleki’s undo and redo functions help you make corrections quickly. This feature is invaluable for refining your artwork and experimenting with different techniques.
Creating Anime Art with Kleki
Understanding the Basics of Anime Art

Anime art is distinct for its stylized character designs, vibrant color schemes, and dynamic poses. To effectively use Kleki for anime art, it’s important to understand the fundamental aspects of this style:
Character Design: Anime characters often feature exaggerated facial expressions, large expressive eyes, and unique hairstyles. The design should reflect the character’s personality and emotions, which can be achieved through careful attention to detail in the features and accessories.
Color Theory: Anime art typically uses bold and vibrant colors for characters, with softer, more subdued tones for backgrounds. Understanding color theory and how to use color to convey mood and depth is crucial for creating visually appealing anime art.
Line Work: Clean, precise lines are a hallmark of anime art. The use of line weight and smooth, flowing curves helps define characters and scenes, making the artwork crisp and clear.
Setting Up Your Workspace in Kleki
Create a New Project: Start by opening Kleki and selecting “New” to create a new canvas. Choose a size that suits your project needs—whether it’s a detailed character illustration or a quick sketch.
Configure Layers: Set up your layers to organize different elements of your artwork. For instance, you might have separate layers for the sketch, inking, base colors, shading, and highlights. This separation allows for easier adjustments and refinements.
The Legendary Monkey D. Family: Garp, Dragon, Luffy, and Kong – 2024
Select Brushes and Colors: Explore the various brushes available in Kleki to find ones that suit your style. For anime art, you might prefer a fine line brush for inking and a softer brush for coloring. Set up your color palette with the hues you plan to use, which will streamline your workflow.
Step-by-Step Guide to Drawing Anime Characters
Sketching: Begin with a rough sketch to outline your character’s pose and proportions. Use a light, non-permanent brush to make adjustments as needed. Pay attention to the character’s posture and expression, ensuring they align with your vision.
Inking: Once the sketch is complete, create a new layer for inking. Select a finer brush and carefully trace over the sketch with clean, precise lines. This step is crucial for defining the character and ensuring clarity in the final artwork.
Coloring: On a new layer, apply base colors to your character. Use the fill tool for larger areas and a brush for more detailed sections. Ensure that colors are applied evenly and that they complement each other.
Shading and Highlights: Add depth to your artwork with shading and highlights. Create additional layers for shadows and light effects, using a soft brush to blend colors smoothly. Pay attention to the light source to ensure that shadows and highlights are consistent.
Final Touches: Review your artwork and make any necessary adjustments. Use Kleki’s blending tools and effects to refine the piece. Consider adding background elements, special effects, or additional details to enhance the overall composition.
Advanced Techniques in Kleki Paint Tool
Utilizing Advanced Brush Settings
Kleki’s brush customization options provide a range of advanced techniques that can elevate your artwork:
Brush Dynamics: Experiment with brush dynamics to create different textures and effects. Adjust settings such as flow, jitter, and scatter to achieve unique results. This can be particularly useful for adding intricate details to your anime art.
Johan Liebert | The Supreme Villain of Anime – 2024
Layer Effects: Use layer blending modes and opacity settings to create complex effects. For example, you can use the “Overlay” mode to add a glow effect or “Multiply” to deepen shadows. This flexibility allows for more sophisticated artwork and enhances the overall visual impact.
Creating Detailed Backgrounds
A well-designed background can significantly enhance the impact of your anime art. Use Kleki’s layering system to build detailed and immersive backgrounds:
Base Layer: Start with a base color or gradient for your background. This layer sets the overall tone and mood of the scene.
Foreground Elements: Add foreground elements such as buildings, trees, or other objects on separate layers. This separation allows you to adjust and refine these elements without affecting the background.
Anime Last Stand: A Thrilling Journey into the World of Epic Battles -2024
Detailing: Use smaller brushes and finer details to add depth and texture to your background. Incorporate elements like lighting effects, atmospheric perspective, and small details to create a more dynamic and engaging scene.
Integrating Text and Effects
Incorporating text and special effects can enhance your anime art, especially for manga-style panels or promotional artwork:
Text Tool: Use Kleki’s text tool to add dialogue or captions. Customize the font, size, and color to fit the style of your artwork. Consider adding speech bubbles or other graphic elements to complement the text.
Effects: Experiment with Kleki’s various effects, such as blurring, noise, or gradient overlays. These effects can add visual interest and enhance the overall aesthetic of your artwork.
Tips for Improving Your Kleki Art Skills
Practice Regularly: Consistent practice is essential for improving your artistic skills. Set aside time each day or week to work on your Kleki art, experimenting with different techniques and styles. The more you practice, the more proficient you’ll become.
One Piece Chapter 1105 Spoiler: A Power Clash and Mysteries Revealed
Study Anime Art Styles: Analyze various anime art styles to gain a deeper understanding of their characteristics. Study how different artists use color, line work, and shading to achieve their unique styles. Incorporate these insights into your own artwork to enhance its quality.
Seek Feedback: Sharing your artwork with others can provide valuable feedback and insights. Join online communities, participate in art forums, or share your work on social media to receive constructive criticism and encouragement.
Explore Tutorials: Take advantage of online tutorials and resources to learn new techniques and improve your skills. Many artists and educators offer tutorials on using Kleki and creating anime art, which can provide valuable tips and tricks.
Experiment with Different Techniques: Don’t be afraid to experiment with different techniques and approaches. Try out new brushes, explore various color schemes, and experiment with different styles to discover what works best for you.
Conclusion
Kleki is a versatile and user-friendly tool that offers a range of features ideal for creating stunning anime art. By mastering Kleki’s functionalities and exploring advanced techniques, you can elevate your digital artwork and bring your anime creations to life. Whether you’re a beginner or an experienced artist, Kleki provides the tools and flexibility needed to create compelling and visually appealing anime art.
Embrace the creative possibilities of Kleki and let your imagination guide you. With practice and experimentation, you’ll be able to produce artwork that captures the essence of anime and showcases your unique artistic vision.
FAQ
1: What is Kleki and what makes it suitable for anime art?
Kleki is a free, web-based paint tool that offers a user-friendly interface and a range of features ideal for creating digital art, including anime. Its suitability for anime art comes from its versatile brush customization, layer management, and color palette. These features allow artists to create detailed character designs, vibrant colors, and clean line work, which are essential for anime-style illustrations.
2: How can I set up my workspace in Kleki for drawing anime characters?
To set up your workspace in Kleki for anime art, follow these steps:
Create a New Project: Open Kleki and choose “New” to start a new canvas. Select a size that fits your project needs.
Configure Layers: Create separate layers for different elements such as sketch, inking, base colors, shading, and highlights. This helps in organizing your work and making adjustments easily.
Select Brushes and Colors: Choose appropriate brushes for sketching, inking, and coloring. Set up your color palette with the hues you plan to use to streamline your workflow.
3: What are some advanced techniques I can use in Kleki to enhance my anime art?
Some advanced techniques in Kleki include:
Brush Dynamics: Experiment with brush settings like flow, jitter, and scatter to create unique textures and effects.
Layer Effects: Use layer blending modes such as “Overlay” or “Multiply” to add effects like glows or deepen shadows.
Detailed Backgrounds: Build complex backgrounds by layering elements, adding textures, and using smaller brushes for detailing.
4: How can I add text and special effects to my anime artwork in Kleki?
To add text and special effects in Kleki:
Text Tool: Use the text tool to insert dialogue or captions. Customize the font, size, and color to fit your artwork’s style.
Special Effects: Apply effects such as blurring or noise using Kleki’s built-in features. These effects can enhance the overall aesthetic and add visual interest to your artwork.
What tips can help me improve my Kleki art skills?
To improve your Kleki art skills:
Practice Regularly: Set aside time each day or week to create artwork and experiment with different techniques.
Study Anime Art Styles: Analyze various anime styles to understand their characteristics and incorporate these insights into your work.
Seek Feedback: Share your art with others to get constructive feedback and support.
Explore Tutorials: Take advantage of online tutorials and resources to learn new techniques and enhance your skills.
Experiment with Techniques: Don’t hesitate to try new brushes, colors, and styles to discover what works best for you.